Rehab

Arthrosamid Rehab Programme

Managing knee osteoarthritis can be challenging, but we're here to help make the decision easier to support your patients.
Arthrosamid®Rehab Programme

While knee osteoarthritis cannot be cured, we believe a long-term commitment to exercise can significantly improve your patients' chances of leading a more active life with reduced knee pain.

We’ve teamed up with two experienced physiotherapists to guide you on your rehabilitation and recovery journey:

Charlie Goodchild pic

Charlie Goodchild

Charlie is the founder of Better, an experienced physiotherapist and has been working since 2010, in the field of musculoskeletal physiotherapy, Charlie has developed his broad skillset in complex cases, persistent/chronic pain, exercise prescription/rehabilitation, sports injuries, and post-operative rehabilitation. 

Read Charlie's bio

Nick Guth pic

Nick Guth

Nick Guth is a highly specialist Physiotherapist, bringing a wealth of experience from private practice, the NHS and sporting environments. His expertise allows him to assess, plan, and manage the rehabilitation of a diverse range of injuries.

Read Nick's bio

How your patients can use this rehab programme

Arthrosamid rehab intro

Click or scroll to continue

Step 1

Watch the introduction video given by Charlie and Nick.

Step 1

african american runner with knee pain injury

Step 2

To help with this process, Charlie and Nick have created three exercise plans aimed at three groups

  • Early stage: for those that haven’t exercised much before or not for a long time, and have higher levels of discomfort during movement, 
  • Intermediate: for those that have been moderately active in recent years and have less discomfort with day-to-day activities, and 
  • Advanced: for those that have been regularly active for many years and may have used a gym to help keep fit in the recent past. 

Step 2

questionnaire

Step 3

To help decide which exercise group you are in, Charlie and Nick have designed a short questionnaire.

Access the questionnaire below and answer the questions as honestly as you can. You will then be directed to which level of exercise with which you should start.

These questions are adapted from the Oxford Knee Score questions 1, 4, 5, 9, and 12, and from the MSK-HQ questions 9, 11, and 13.  

Step 3

elderly man exercises outdoors

Step 4

Each person will require different amount of exercise to achieve optimal results. We recommend working with an experienced clinician to help individuals with the exercise to meet their needs and capabilities. 

The exercise dose parameters are merely a guide and should not be considered medical advice.

Step 4

Movement is good for everybody, at any stage of arthritis. The key is to choose exercise that is best suited to your patients current abilities.

Early Programme

Sit to stand

Sit To Stand

 This exercise is called Sit to Stand. It is both simple and functional. Getting out of a chair is something we do often and performed with a purpose can also be a very useful exercise.  

Physio 

Sit on a chair with your feet and knees at hip width apart. Start with your knees at a right angle, but you can make this easier by choosing a higher surface, or harder with a lower surface. Cross your arms across your body and push through your feet to stand up. Ensure your knee and hips fully straighten at the top, pause for a split second and then with control return to your seated position. Repeat 

Bridge

Single Leg Glute Bridge

This exercise is called a Bridge, it is targeting the muscles on the back of your thigh and buttocks.

Physio

Start by laying on your back with your feet planted hip width apart. Ensuring that your knees don't drop together or drop out of position. Push through your feet and lift your hips towards the sky. Pause for a second at the top, then slowly lower yourself down to the starting position.

Hip abduction

Standing Hip Abduction

This exercise can be important for balance on the standing leg, whilst also targeting important muscles around the hip on the moving leg.

Physio

Stand tall holding the edge of a surface or putting your hands on the wall. Ensuring your feet face forwards, take one leg out to the side as far as it can go without bending your body to the side or hitching through your hip.  Then return it back to the standing position. Repeat this for the desired number of repetitions. To make this harder, try using a looped resistance band.

Heel raise

Standing Heel Raise

The calf muscles are essential for walking and climbing stairs, they commonly weaken with age and often get missed in a routine exercise plan. 

Physio

Stand tall, holding the edge of a surface or putting your hands on the wall. Remaining tall and without bending your knees, push up onto your tip toes as high as you can go. Then slowly return so that your feet are flat on the floor. 

Progression

Carry out the same movement as the standing heel raise but place the front half of your feet on the edge of a step, lowering your feet below the step to feel a stretch in your calf muscles, before raising up to a tip toe position to strengthen the calf muscles through a larger range of motion.

Split squat

Split Squat

The split position adopted in this exercise adds an element of challenge to your balance. Falls are one of the most significant risk factors for sudden decline in health and function as we age. It also works on key muscles in our thighs and buttocks. 

Physio

Stand next to a surface, placing one hand on it if required, move one foot in front of the other spaced in front and behind you and with both feet facing forwards. Lower yourself down to feel tension in your thighs, the lower you go, the harder it will feel. Pause at the bottom and then return to the starting position. If you find this painful on your knees, instead of squatting up and down, just hold the lowered position until you feel fatigue in your muscles. Then switch your feet around to do the same on the other side. You can make this exercise harder by not holding on to anything to challenge your balance at the same time as working your muscles. 

Step up

Step Up

This exercise speaks for itself, we would all benefit from the ability to go up and down stairs.

Physio

Standing sideways on to the bottom step of your stairs or an exercise step. Place one foot on the step and push through that leg to step up. Pause at the top to challenge your balance and then with control, lower yourself to the ground again. 

Regression

If you aren’t confident of your balance, you can use a surface to hold on to in order to complete the movement Try not to use the surface to pull up or push through as this will reduce the workload through the leg which is the main aim of this exercise. To make it harder, just tap your heel on the ground, instead of fully weight bearing, before pushing back up with the standing leg.

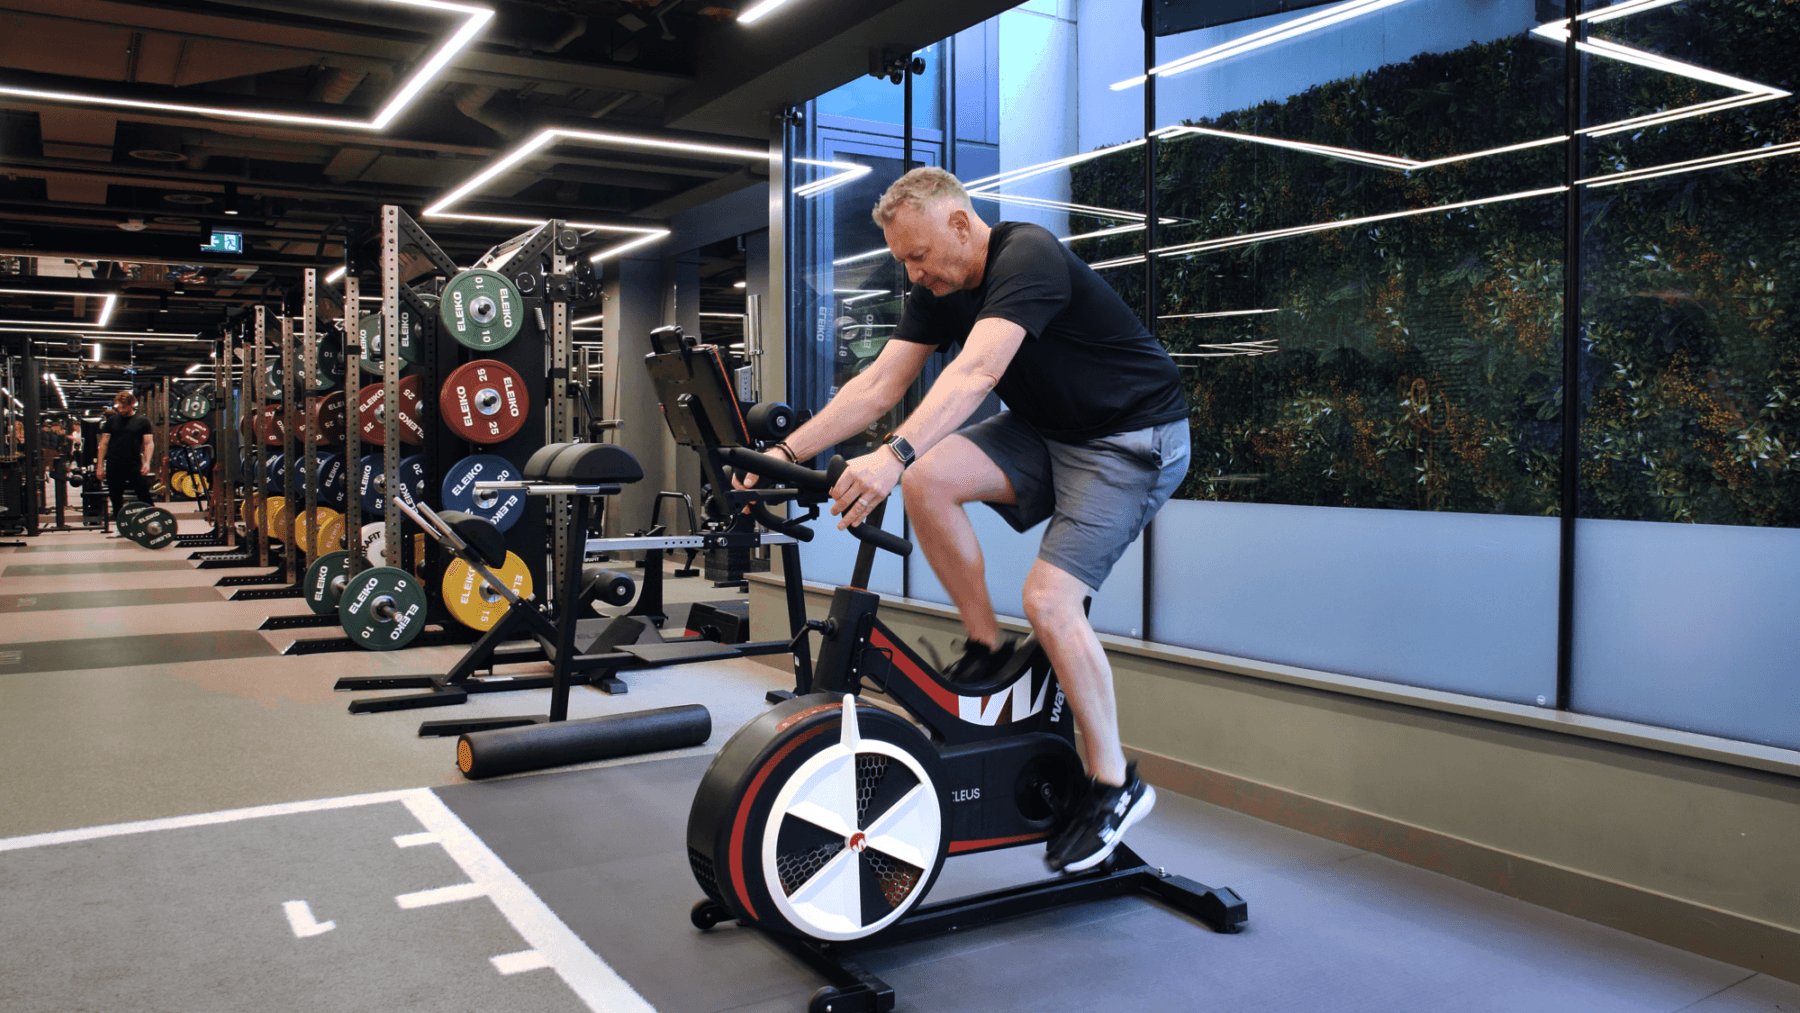
Walking and Cycling

Why: Walking and cycling can both be safe and appropriate for this stage of recovery. It will help to improve your cardiovascular health, as well as offer more movement to your joints, motion is lotion remember. 

Physio: Going for regular walks or cycles can be incredibly beneficial, a walk that isn’t too hilly would be a good place to start. But feel free to increase the distance and difficulty as your fitness improves. 

Cycling is also a great option, but you may choose to start with an indoor bike if you are unfamiliar to with cycling. As your fitness improves, maybe try outdoor cycling to enjoy the additional benefits of exercising in nature.  

Time: Aim for 150 minutes of moderate intensity exercise per week

Frequency: every 1-2 days

Intermediate

Single leg heel raise

Single Leg Heel Raise

Physio

This is the single leg heel raise. Start by standing tall, holding the edge of a surface or putting your hands on a wall for balance. Remaining tall and without bending your knees (you may have to tense your thigh muscle to help with this part), then push up onto your tip toes as high as you can go. Pause at the top then with lower with control so that your feet are flat on the floor. You can progress this by either placing the front half of your foot on a step, to increase the range of movement achieved on the lowering phase, or by holding a weight in your hand to increase the challenge on your calf muscles. Ensure the weight isn’t too heavy that it prevents you from raising your heel high off the ground or leads to you bending through the knee to compensate.

Split squat without support

Split Squat Without Support

Physio

This exercise is traditionally known as a split squat, or you may hear it being called the static lunge. Stand next to a surface, placing one hand on it for stability if needed, move one foot in front of the other spaced in front and behind you and with both feet facing forwards. Steadily lower yourself into a lunge position by lowering your body between your legs so that your back knee almost touches the ground. Pause at the bottom and then return to the starting position by driving through both legs. You can make this exercise easier by not lower your knee all the way to the floor, or you can make it harder by holding on to a weight. 

Single leg squat

Single leg mini squat

This is a single leg mini dip. Single leg body weight exercises are fantastic at ensuring symmetry between both legs. Often with joint pain we see that the opposite side compensates for the weakness on the affected side by working harder in day-to-day activities. These exercises can help to prevent that from happening or reverse the changes that have already happened. 

Physio

Stand tall, holding on to the edge of a surface or putting your hands on the wall. Remove one leg off the ground and with standing leg bend both your knees and hips into a mini squat position. Pause at the bottom and then return to the starting position. You may think by removing the support you’re holding onto would be beneficial, but balance is not the target for this exercise, so if you need to make it more challenging, try increasing the number of repetitions you complete in a single set. 

Bridge

Single Leg Glute Bridge

This exercise is called a Bridge, it is targeting the muscles on the back of your thigh and buttocks.

Physio

Start by laying on your back with your feet planted hip width apart. Ensuring that your knees don't drop together or drop out of position. Push through your feet and lift your hips towards the sky. Pause for a second at the top, then slowly lower yourself down to the starting position.

Weighted sit to stand

Weighted Sit To Stand

Physio

This is a weighted sit to stand. Stand with your feet just wider than hip width apart whilst holding the weight close to your chest. The weight can be a dumbbell or plate weight, or even something heavy you can find at home. Imagine you're going to sit on to a chair by bending your knees and your hips. Lower down to a seated position, pause, and then return to the top. You can make this more challenging by adding more weight. Alternatively, you can make this exercise easier by reducing the amount of weight that you are holding.

Deadlift

Deadlift

A deadlift is a commonly performed exercise in a gym environment but can also be performed at home quite easily. It essentially helps to train the movement of lifting and carrying loads off the ground, like a box or bags of shopping. 

Physio

Holding a weight in both hands, aim to place the weights on the floor by bending with your hips and knees. Pause at the bottom ensuring tension remains in your thighs and then return to a standing position by pushing through your feet straightening your knees and hips at the same time. Altering the amount of weight that you’re holding will either increase or reduce the difficulty of this exercise. 

Walking and Cycling

Why: Walking and cycling can both be safe and appropriate for this stage of recovery. It will help to improve your cardiovascular health, as well as offer more movement to your joints, motion is lotion remember. 

Physio: Going for regular walks or cycles can be incredibly beneficial, a walk that isn’t too hilly would be a good place to start. But feel free to increase the distance and difficulty as your fitness improves. 

Cycling is also a great option, but you may choose to start with an indoor bike if you are unfamiliar to with cycling. As your fitness improves, maybe try outdoor cycling to enjoy the additional benefits of exercising in nature.  

Time: Aim for 150 minutes of moderate intensity exercise per week

Frequency: every 1-2 days

Advanced

Weighted squat

Weighted Squat

Physio

This exercise is a fantastic exercise to target all the key muscles in your lower body. It’s great for functional tasks such as walking, climbing stairs and running. It can be performed with a barbell rested on your shoulders or by holding a weight in front of your chest just underneath your chin. With your feet just wider than hip width apart, bend both your knees and hip imagining you’re lowering into a seated position. Pause at the bottom, then straighten through your hip and knees to return to your standing position. 

Progression

The challenge of this exercise can be altered by increasing or decreasing the amount of weight you have on the bar or you’re holding. 

Walking lunge

Walking Lunge

Physio

This exercise challenges both the strength and balance in your lower body. Start by standing in a neutral position with your feet hip width apart. Keeping your chest up and shoulders back at all times, take a large stride forward and upon planting the front foot cushion the landing by bending both knees to absorb the impact. Before the back knee touches the ground, push through the floor to rise up again and then bring the back foot forward into the starting posture. 

An alternative if you don’t have space is to push off the front foot and bring both feet back together.

Progression

You progress this exercise by holding weights in both hands whilst doing this exercise. This will increase the demands on your muscles and test your balance further. Be confident of doing it without any weight before moving onto this stage. 

Leg extension

Leg Extension

This machine targets specifically the muscles in the front of your thighs, called quadriceps. We know that these muscles are vital for functional tasks such as getting out of a chair and going up stairs. These muscles are also considered the most important muscles for protecting your knee joint. 

Firstly, start by adjusting the back rest to ensure the back of your knees are against the edge of the seat. Then adjust the shin pad so that it rests just above your ankles. Whilst gripping on to the handles to brace your upper body, press the shin pad away until your knees are fully extended. Pause at the top and then slowly lower back to the starting position. It is vital to control the decent to ensure that your muscles are working, rather than gravity doing the job for you. 

Progression/Regression

To alter the difficulty of the exercise you can adjust the pin on the machine to change to your desired weight. 

Weighted deadlift

Weighted Deadlift

Physio

Lifting things from the floor is a normal and important part of life. To ensure that you protect yourself when lifting heavy things, you should practice lifting during your exercise routine. That’s why the deadlift is such a good exercise. Start by standing behind the barbell or kettlebell with your feet at hip width apart. Then bend down to grip the barbell with both hands just wider than hip width apart to ensure your knees can move freely during this exercise. Bend both your knees and hips to move into the crouched position, take the tension of the bar, keeping your chest facing forwards, drive through the legs to come into the standing position. Pause at the top and then reverse the movement to return it to the starting position ensuring you aren’t dropping the weight down too quickly. The tension may be felt through the lower back, this is fine to experience as long as it isn’t pain that you’re experiencing. 

Regression

Altering the amount of weight you’re using can make the challenge of this exercise easier. You can also elevate the starting position of the weights to reduce how far down you need to go to finish the task. 

Single leg press

Single Leg Press

his exercise requires a leg press machine. To prevent asymmetry in the lower body, we advise that this exercise is performed as a single leg exercise. Start by putting both feet on the plate in what you think would be a normal standing position at around about hip width apart. Remove one leg from the plate and then press away with the opposite leg. You can be powerful when pressing the plate away, but you must return the plate to the starting position with control. Repeat this for the desired amount of reps. 

Progression/Regression

To alter the difficulty of the exercise you can adjust the pin on the machine to change to your desired weight. It’s important to note that other leg press machines may require you to load it with plates rather than it being a pin loaded one, and each machine may feel different despite the weights seeming the same. 

Hamstring curl

Hamstring Curl

This machine targets specifically the muscles in the back of your thigh. We know these muscles are vital for the control and health of your knees. The hamstring muscles are used less often in daily life and often become weak as a result. To maintain balance in your thigh muscles, it’s important to strengthen hamstring muscles.  

Firstly, lay on your front, holding onto the handles and ensure the roll is located at the bottom of your legs just above your heels. Press your legs into the roll and bring your heel in the direction of your buttocks. Once you have reached your maximal range, slowly return your legs back to the starting position. 

Progression/Regression

To alter the difficulty of the exercise you can adjust the pin on the machine to change to your desired weight.

Single leg weighted calf raise

Single Leg Weighted Calf Raise

Physio

This is the single leg heel raise. Start by standing with the front half of your foot on a step, holding the edge of a surface or putting your hands on a wall for balance, hold a small weight in your other hand (if this is too heavy, your body weight will be fine too). Remaining tall and without bending your knees (you may have to tense your thigh muscle to help with this part), then push up onto your tip toes as high as you can go. Pause at the top then with lower with control so that your feet are flat on the floor. You can progress this by either placing the front half of your foot on a step, to increase the range of movement achieved on the lowering phase, or by holding a weight in your hand to increase the challenge on your calf muscles. Ensure the weight isn’t too heavy that it prevents you from raising your heel high off the ground or leads to you bending through the knee to compensate. 

Running, Hiking & Cycling

Why: Starting to increase the intensity of your cardiovascular exercise is an essential part of this stage. As you work on the strength of your leg muscles, you should find that your functional capacity will also increase. In addition to walking, hiking and cycling which we touched on in the early and intermediate stages section of this series, you can now try running. Not everyone has to run, and not everyone tolerates running, but many people with osteoarthritis cope well and benefit from running. It is likely best to limit running to twice per week with other forms of cardio then topping up to the 75- or 150-minute guideline. 

Time: Aim for 150 minutes of moderate intensity exercise per week or 75 minutes of vigorous exercise (or a combination of different intensities).